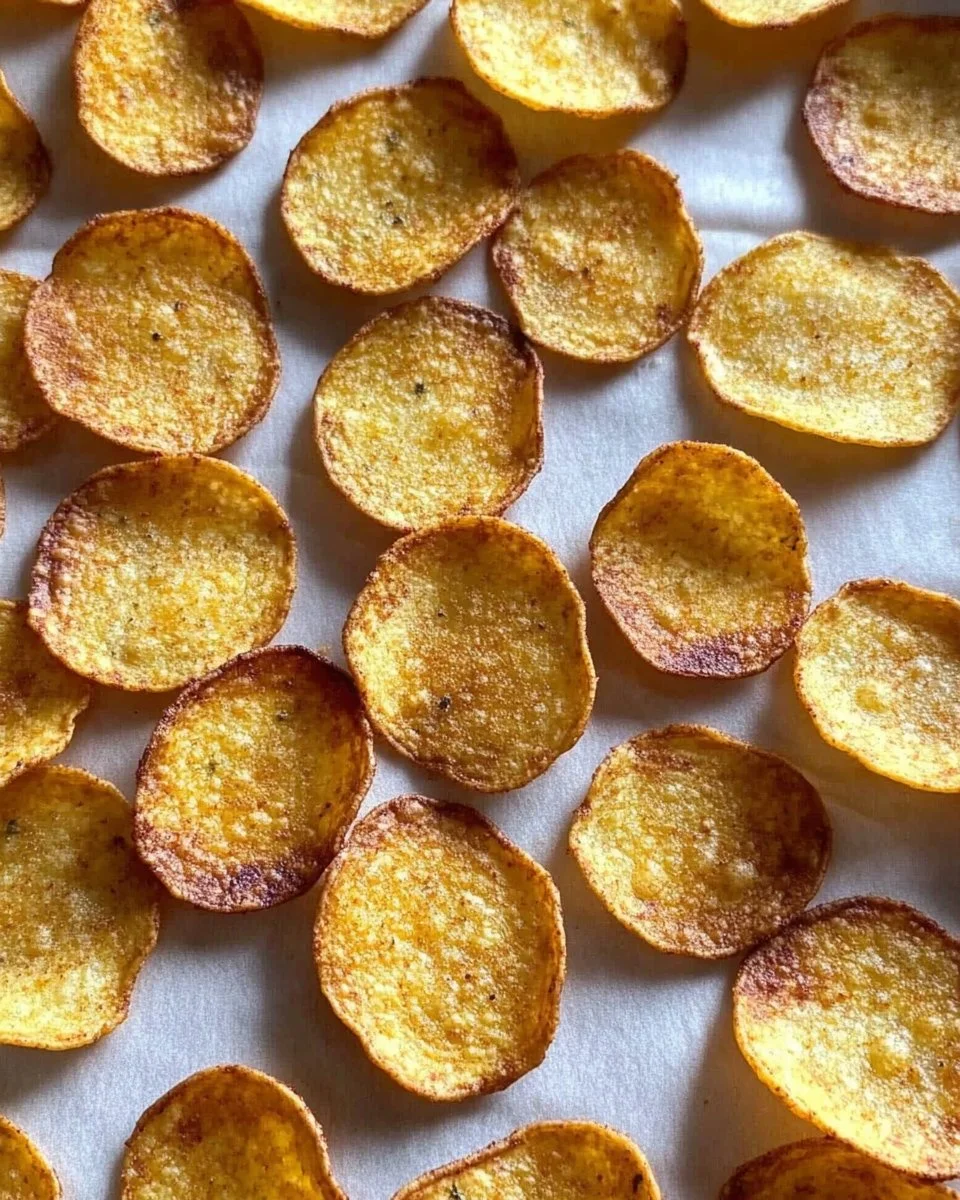
Baked Chickpea Chips

Baked chickpea chips are a delightful and healthy alternative to traditional snack options. If you’re looking to satisfy that crunch craving without the guilt, these chips are for you! Not only are they simple to make, but they also require minimal ingredients that pack a nutritional punch. Plus, you can customize them to fit your flavor preferences, making each batch a unique treat. Whether you’re enjoying a cozy night in or hosting a gathering, these chips are sure to impress everyone!
The Appeal of Baked Chickpea Chips
This recipe works brilliantly for several reasons. Firstly, it’s astonishingly easy; even if you’re a novice in the kitchen, you’ll find that making baked chips is straightforward and quick. It requires just a handful of ingredients and minimal prep time, which means you can whip up a batch in no time. Secondly, it’s budget-friendly! Chickpea flour is typically affordable and versatile. Lastly, these chips can be made in large quantities, perfect for parties or meal prep. You’ll wonder why you haven’t made them sooner!
Simple Overview of the Cooking Process
The process for making baked chickpea chips is as enjoyable as the end result. You’ll start by mixing chickpea flour with water and salt until smooth—a quick step that leads to a delightful batter. Then, you’ll spoon this batter onto a baking sheet lined with parchment paper, ensuring they’re evenly spread for uniform cooking. After baking until golden brown, all that’s left is to let them cool before digging in. It’s as easy as that!
Ingredients
Prep Time: 10 minutes
Cook Time: 10 minutes
Total Time: 20 minutes
Servings: Varies based on size
- 80 grams chickpea flour
- 140 grams water
- 1/2 teaspoon salt
- Chopped fresh herbs or dried herbs, or spices
The key ingredients in this recipe focus on chickpea flour, which is not only gluten-free but also rich in protein and fiber. The water helps create the batter’s consistency, while the salt enhances the flavor. Feel free to get creative with the herbs or spices to make these chips truly your own!
Step-by-Step Instructions
Let’s break down the process of making these crispy, delicious baked chickpea chips into manageable steps:
- Preheat your oven: Start by preheating your oven to 200C (400F). This ensures that your chips will cook evenly and achieve a perfect golden color.
- Mix the batter: In a mixing bowl, combine the chickpea flour, water, and salt. Stir well until you achieve a smooth consistency, making sure there are no lumps.
- Prepare your baking sheets: Line two baking sheets with parchment paper for an effortless cleanup. This step is crucial as it prevents the chips from sticking.
- Forming the chips: Using a spoon, dollop the batter onto the parchment. Spread each dollop into thin, uniform circles to ensure even cooking. The thinner they are, the crunchier they’ll be!
- Add flavor: If you desire more taste, now’s the time to sprinkle chopped herbs or spices over the batter before baking.
- Baking: Place the sheets in the oven and bake for about 10 minutes, keeping a close eye on them. They can burn quickly, so stay alert!
- Cooling: Once baked to a lovely golden brown, remove them from the oven and let them cool on the baking sheets for 15 to 20 minutes. This helps them crisp up even more.
Creative Ways to Serve Baked Chickpea Chips
These baked chickpea chips make fantastic snacks on their own, but they truly shine when paired with various dips or sides. Consider serving them with:
- Hummus for a classic duo
- Guacamole for a creamy contrast
- Yogurt dip or tzatziki for a refreshing twist
- Salad toppings for added crunch
- Perfect with drinks during a casual gathering
They’re ideal for movie nights, game days, or even as a healthy option at parties. Let your imagination run wild!
Storing Your Baked Chickpea Chips
To maintain their crispiness, it’s essential to store your chips properly. Keep them in an airtight container at room temperature. They can generally last for 4-7 days; however, they’re best enjoyed within the first few days after baking. If you’re looking to save some for later, consider freezing unbaked batter. Simply store it in the fridge or freezer for future use.
When it comes to reheating, the best method is to pop them back into a preheated oven for a few minutes. This will re-crisp your chips without sacrificing their texture.
Essential Cooking Tips for Success
Here are a few tips to help ensure your baked chickpea chips come out perfectly:
- Ensure your batter is smooth—lumps can lead to uneven cooking.
- Keep an eye on the chips while baking; they can go from golden to burnt quickly!
- For extra crispiness, consider using a slightly higher oven temperature or a broiler for the last minute of baking.
Common mistakes include overbaking or failing to spread the batter thinly enough, leading to softer chips. Keep these tips in mind and you’ll be a chickpea chip pro in no time!
Fun Variations to Try
The beauty of baked chickpea chips is their versatility. Feel free to experiment with different flavors and ingredients:
- Add nutritional yeast for a cheesy flavor without the dairy.
- Use different spices like paprika, cumin, or curry powder to change up the taste.
- Incorporate various finely chopped vegetables like spinach or kale into the batter for added nutrients.
These variations don’t just entice the taste buds; they also make the chips visually appealing!
Your Questions Answered
1. Can I use different types of flour?
Yes, other legumes or gluten-free flours can also work! Just keep in mind that the texture and flavor may vary.
2. How can I make them spicier?
Feel free to add chili powder or cayenne pepper into the batter for an extra kick.
3. What dips pair best with these chips?
These chips pair wonderfully with hummus, guacamole, and any creamy dip of your choice. Experiment to find your favorite!
4. How do I know when they’re done baking?
Look for a golden brown color and a crisp texture. If they are still soft, give them a few more minutes in the oven.
5. Are these chips suitable for a gluten-free diet?
Absolutely! Chickpea flour is naturally gluten-free, making these chips a safe choice.