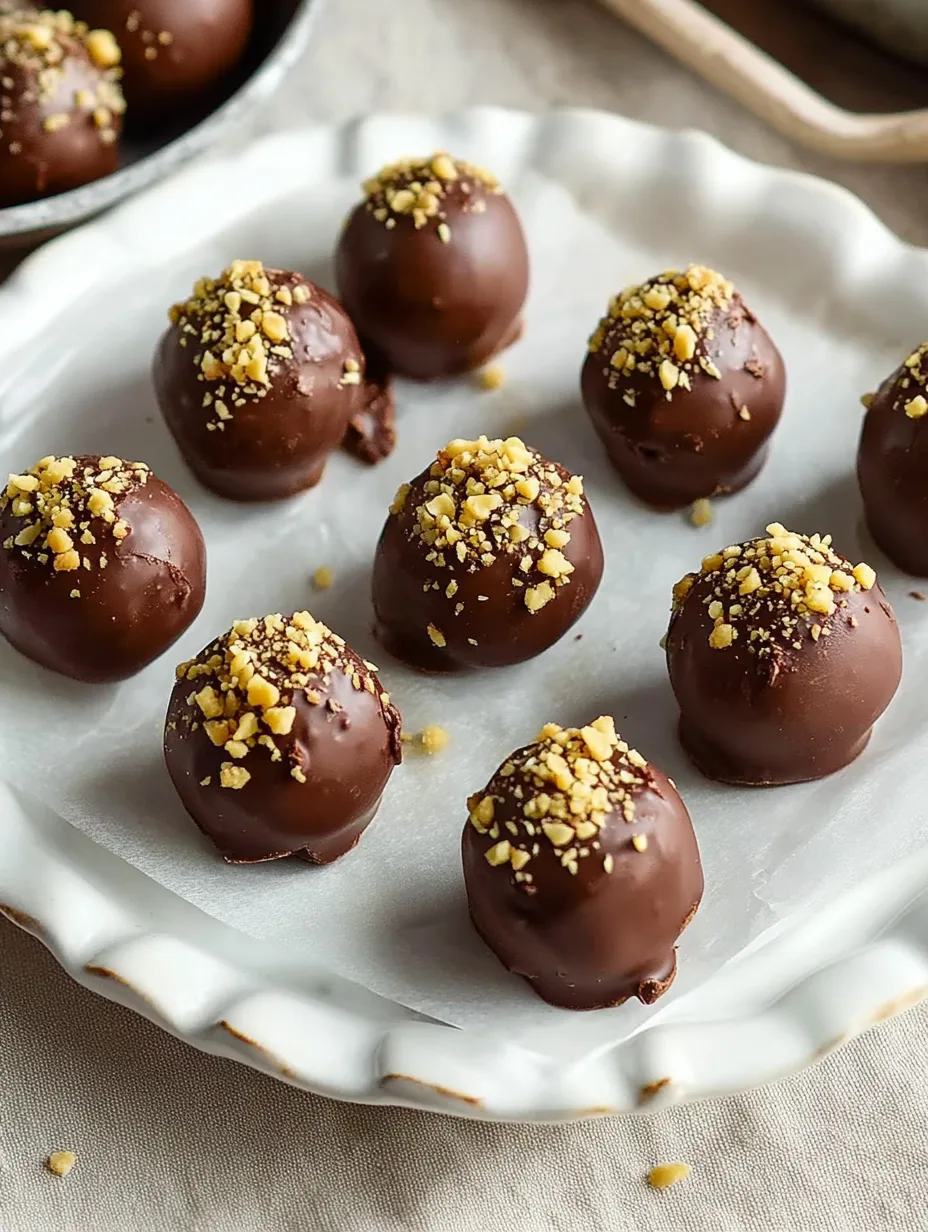
Dubai Chocolate Truffles
Introduction
There’s something truly special about indulging in a rich, decadent chocolate treat that’s been carefully crafted with love and attention to detail. For me, that treat is a homemade version of Dubai chocolate, made with the finest ingredients and a unique twist that sets it apart from other chocolates. In this recipe, we’ll be using kataifi, also known as kadayif, which is an ultrafinely shredded phyllo dough that adds a delightful texture and flavor to our chocolate truffles.
I’ve always been fascinated by the art of creating homemade chocolates, and this recipe is one of my favorites. Not only is it easier to make than you might think, but it’s also a fraction of the cost of buying Dubai chocolate bars in stores. Plus, you can customize the recipe to your liking by using different types of chocolate or adding your own favorite flavorings. Whether you’re a chocolate lover, a foodie, or just someone who appreciates the joy of creating something special, this recipe is perfect for you.
One of the things I love most about this recipe is the way it brings people together. Imagine serving these delicious truffles at a dinner party or giving them as gifts to your loved ones. The look of delight on their faces when they take a bite is truly priceless. So, if you’re looking for a recipe that’s sure to impress and satisfy your sweet tooth, you’re in the right place. Let’s get started and make some homemade Dubai chocolate truffles that are sure to become a new favorite treat.
Table of Contents
- Why You’ll Love This Recipe
- Ingredients
- Step-by-Step Instructions
- Tips & Tricks for the Best Results
- Recipe Variations
- How to Store & Reheat
- Nutrition Information
- Frequently Asked Questions
- Conclusion
Why You’ll Love This Recipe
- Quick and easy to make, with a simple ingredient list and straightforward instructions
- Customizable to your taste preferences, with options for different types of chocolate and flavorings
- Perfect for special occasions or as a gift for friends and family
- Fraction of the cost of buying Dubai chocolate bars in stores
- Unique texture and flavor from the kataifi, setting it apart from other chocolates
- Crowd-pleasing and sure to impress, with a delicious and decadent taste
Ingredients
- 1 cup (200g) dark chocolate chips (at least 70% cocoa)
- 1/2 cup (120g) unsalted butter, softened
- 1 cup (200g) kataifi (kadayif), thawed
- 1 teaspoon vanilla extract
- 1/4 teaspoon salt
- 1 cup (200g) confectioners’ sugar
- 1/2 cup (60g) chopped nuts (optional)
Step-by-Step Instructions
- Melt the chocolate chips in a double boiler or in the microwave in 30-second increments, stirring between each interval, until smooth and creamy.
- In a separate bowl, mix together the softened butter, kataifi, vanilla extract, and salt until well combined.
- Gradually add the confectioners’ sugar to the butter mixture, mixing until a dough forms.
- Roll the dough into small balls, about 1 inch (2.5 cm) in diameter.
- Dip each ball into the melted chocolate, using a fork to coat evenly.
- Place the coated truffles on a baking sheet lined with parchment paper and refrigerate for at least 30 minutes to set.
- If desired, roll the truffles in chopped nuts before serving.
Tips & Tricks for the Best Results
Using High-Quality Chocolate
When it comes to making homemade chocolates, the quality of the chocolate is crucial. Look for dark chocolate chips with at least 70% cocoa content for the best flavor and texture. Avoid using low-quality chocolate or chocolate chips with additives, as they can affect the taste and appearance of your truffles.
Working with Kataifi
Kataifi can be a bit delicate to work with, so be sure to handle it gently to avoid breaking or tearing the strands. If you find that your kataifi is too dry or brittle, you can try adding a small amount of water or egg white to help it come together.
Tempering the Chocolate
Tempering the chocolate is an important step in making professional-looking truffles. To temper your chocolate, melt it to around 105°F (40°C), then cool it to around 80°F (27°C) before re-heating it to the working temperature of around 90°F (32°C). This will give your chocolate a smooth, glossy finish and a satisfying snap when broken.
Avoiding Air Pockets
Air pockets can be a problem when making truffles, as they can cause the chocolate to crack or break. To avoid air pockets, make sure to mix your dough thoroughly and roll the truffles gently but firmly. You can also try tapping the truffles gently on the counter to remove any air bubbles that may have formed.
Storing Your Truffles
To keep your truffles fresh and delicious, store them in an airtight container in the refrigerator for up to 5 days. You can also freeze them for up to 2 months, but be sure to wrap them tightly in plastic wrap or aluminum foil to prevent freezer burn.
Recipe Variations
Raspberry or Orange Flavorings
Adding a hint of raspberry or orange flavor to your truffles can be a delicious and unique twist. Simply add a few drops of raspberry or orange extract to the dough before rolling the truffles, or mix in some dried raspberry or orange zest for added flavor and texture.
Coating with Cocoa Powder or Confectioners’ Sugar
Instead of coating your truffles with melted chocolate, you can try coating them with cocoa powder or confectioners’ sugar. This will give them a delicious and elegant appearance, and can be a nice change of pace from the usual chocolate coating.
Adding Nuts or Coffee
Adding some chopped nuts or a sprinkle of coffee powder to your truffles can be a great way to add texture and flavor. Simply mix the nuts or coffee into the dough before rolling the truffles, or sprinkle them on top of the truffles before serving.
Using Different Types of Chocolate
While dark chocolate is a classic choice for truffles, you can also try using milk chocolate or white chocolate for a different flavor and texture. Simply melt the chocolate according to the instructions and use it to coat your truffles.
How to Store & Reheat
To store your truffles, place them in an airtight container in the refrigerator for up to 5 days. You can also freeze them for up to 2 months, but be sure to wrap them tightly in plastic wrap or aluminum foil to prevent freezer burn. When you’re ready to serve, simply remove the truffles from the refrigerator or freezer and let them come to room temperature.
For longer-term storage, you can also consider vacuum-sealing your truffles or storing them in a cool, dry place. This will help to preserve the flavor and texture of the truffles and keep them fresh for a longer period of time.
To reheat your truffles, simply place them in the microwave for a few seconds or until they’re slightly softened. You can also try reheating them in a double boiler or in a warm water bath, but be careful not to overheat the chocolate. Once the truffles are reheated, you can serve them immediately or let them cool to room temperature before serving.
Nutrition Information
While the exact nutrition information for this recipe will depend on the specific ingredients and portion sizes used, here are some general guidelines. Each truffle will contain approximately 120-150 calories, 8-10g of fat, 10-12g of carbohydrates, and 2-3g of protein. They will also contain a significant amount of sugar and caffeine from the chocolate, so be sure to consume them in moderation.
Frequently Asked Questions
Can I Make This Recipe Ahead of Time?
Yes, you can make this recipe ahead of time. Simply prepare the dough and roll the truffles, then store them in an airtight container in the refrigerator for up to 5 days or freeze them for up to 2 months. When you’re ready to serve, simply remove the truffles from the refrigerator or freezer and let them come to room temperature.
Can I Use Different Types of Chocolate?
Yes, you can use different types of chocolate for this recipe. While dark chocolate is a classic choice, you can also try using milk chocolate or white chocolate for a different flavor and texture. Simply melt the chocolate according to the instructions and use it to coat your truffles.
How Do I Store My Truffles?
To store your truffles, place them in an airtight container in the refrigerator for up to 5 days. You can also freeze them for up to 2 months, but be sure to wrap them tightly in plastic wrap or aluminum foil to prevent freezer burn.
Can I Add Nuts or Other Mix-Ins to My Truffles?
Yes, you can add nuts or other mix-ins to your truffles. Simply mix the nuts or mix-ins into the dough before rolling the truffles, or sprinkle them on top of the truffles before serving.
How Do I Reheat My Truffles?
To reheat your truffles, simply place them in the microwave for a few seconds or until they’re slightly softened. You can also try reheating them in a double boiler or in a warm water bath, but be careful not to overheat the chocolate.
Conclusion
And there you have it – a delicious and decadent recipe for homemade Dubai chocolate truffles that’s sure to impress and satisfy your sweet tooth. I hope you’ve enjoyed this recipe and will give it a try in your own kitchen. Don’t forget to leave a star rating in the comments below and tag me on Instagram so I can see your creations. Happy baking, and I’ll see you in the next recipe!
Dubai Chocolate Truffles
Ingredients
- 1 cup dark chocolate chips (at least 70% cocoa)
- 1/2 cup unsalted butter, softened
- 1 cup kataifi (kadayif), thawed
- 1 teaspoon vanilla extract
- 1/4 teaspoon salt
- 1 cup confectioners' sugar
- 1/2 cup chopped nuts (optional)
Instructions
- Melt the chocolate chips in a double boiler or in the microwave in 30-second increments, stirring between each interval, until smooth and creamy.
- In a separate bowl, mix together the softened butter, kataifi, vanilla extract, and salt until well combined.
- Gradually add the confectioners' sugar to the butter mixture, mixing until a dough forms.
- Roll the dough into small balls, about 1 inch (2.5 cm) in diameter.
- Dip each ball into the melted chocolate, using a fork to coat evenly.
- Place the coated truffles on a baking sheet lined with parchment paper and refrigerate for at least 30 minutes to set.
- If desired, roll the truffles in chopped nuts before serving.