Fruity Pebbles Sushi
Introduction
Have you ever looked at your breakfast cereal and thought, “What if this could be dessert?” That’s exactly what Fruity Pebbles Sushi feels like—a playful twist where cereal transforms into adorable, bite-sized treats that look like sushi but taste like pure childhood joy.
This recipe is bright, crunchy, and sweet, making it perfect for parties, kids’ snacks, or just a fun kitchen experiment. Think of it as the dessert version of arts and crafts—simple, creative, and incredibly satisfying. And the best part? No oven required.
Table of Contents
| Sr# | Headings |
|---|---|
| 1 | What Is Fruity Pebbles Sushi? |
| 2 | Why You’ll Love This Recipe |
| 3 | Ingredients Breakdown |
| 4 | Preparation & Cooking Details |
| 5 | Step-by-Step Instructions |
| 6 | Tips for Perfect Sushi Rolls |
| 7 | Creative Variations |
| 8 | Decorating Ideas |
| 9 | Serving Suggestions |
| 10 | Storage & Shelf Life |
| 11 | Common Mistakes to Avoid |
| 12 | Nutritional Overview |
| 13 | Why Kids Love Fruity Pebbles Sushi |
| 14 | Perfect Occasions for This Dessert |
| 15 | Final Thoughts |
1. What Is Fruity Pebbles Sushi?
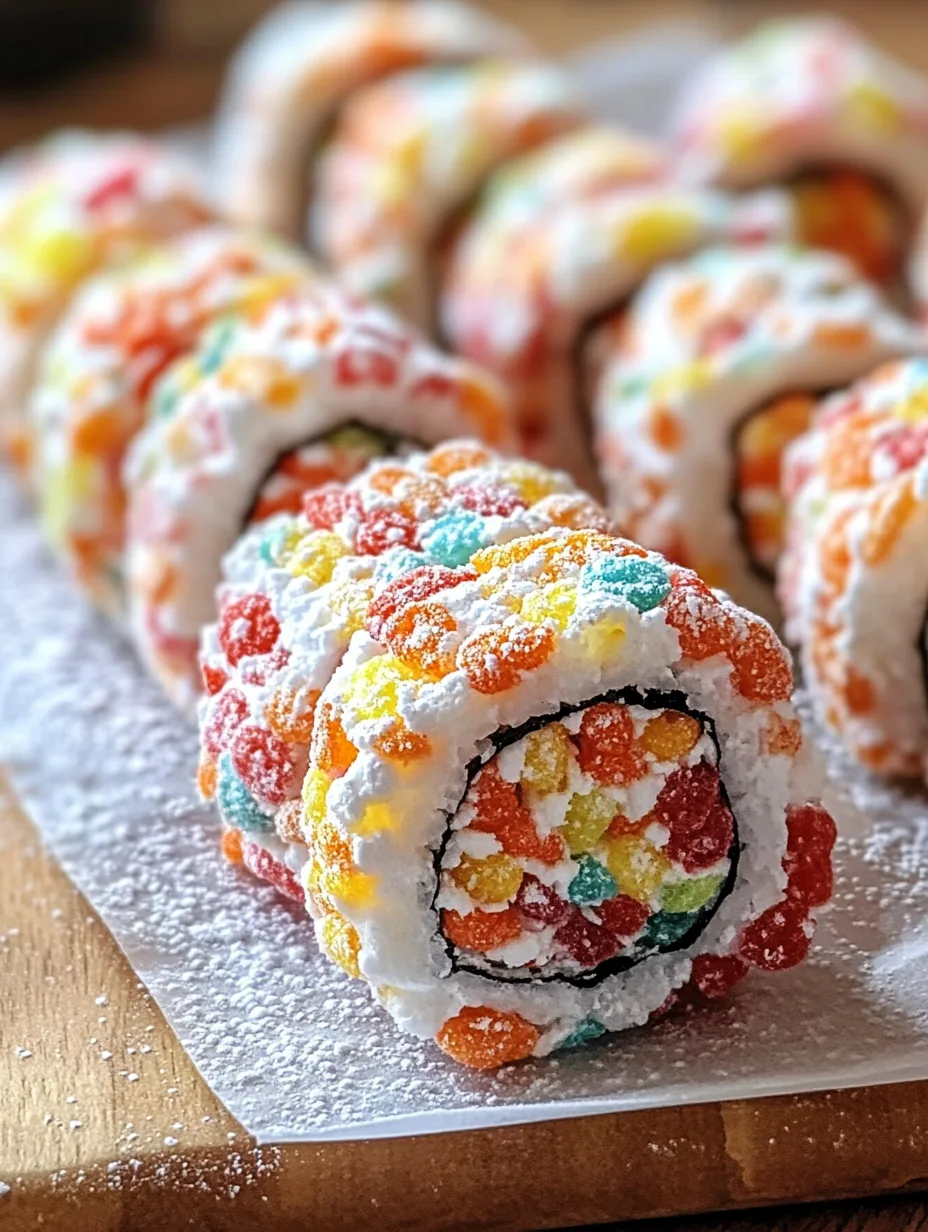
Fruity Pebbles Sushi is a no-bake dessert made with marshmallows, butter, and Fruity Pebbles cereal. It’s shaped into rolls and sliced to resemble sushi pieces.
Instead of rice and seaweed, you get gooey marshmallow cereal and colorful toppings. It’s like taking a classic rice crispy treat and giving it a fun, rainbow makeover.
2. Why You’ll Love This Recipe
Quick and easy: Done in under 20 minutes.
No baking required: Perfect for beginners.
Kid-friendly: Fun to make and eat.
Visually stunning: Bright colors make it Instagram-worthy.
It’s one of those recipes where effort is low, but the “wow factor” is high.
3. Ingredients Breakdown
Let’s take a closer look at what makes this dessert so magical:
- Fruity Pebbles cereal: The star of the show—colorful and crunchy.
- Butter: Adds richness and prevents sticking.
- Mini marshmallows: The glue that holds everything together.
Optional toppings:
- Swedish Fish candies
- Fruit roll-ups
- Powdered sugar
- Extra Fruity Pebbles
These extras take your sushi from simple to spectacular.
4. Preparation & Cooking Details
- Prep Time: 15 minutes
- Cook Time: 5 minutes
- Total Time: 20 minutes
- Servings: 12–16 bites
This is one of those recipes you can whip up faster than ordering takeout.
5. Step-by-Step Instructions
Ingredients:
- 4 cups Fruity Pebbles cereal (the rainbow magic!)
- 3 tbsp unsalted butter
- 4 cups mini marshmallows (or 1 bag, about 10 oz)
- Optional toppings: Swedish Fish candies (for “fish”), fruit roll-ups (for wrapping like nori), powdered sugar (for “snow”), or extra Fruity Pebbles for crunch.
Instructions:
Melt the base:
In a large pot over low heat, melt the butter. Add the mini marshmallows and stir constantly until fully melted and smooth (about 3-5 minutes). Don’t let it burn—keep it gentle!
Mix in the crunch:
Remove from heat and quickly fold in the Fruity Pebbles cereal. Stir until everything’s evenly coated in that gooey goodness. The colors will pop!
Shape the “rice”:
While still warm, scoop the mixture onto a sheet of parchment paper or a lightly greased surface. Press it into a thin rectangle (about 9×12 inches) using your hands or a spatula. If it sticks, wet your hands a bit.
Roll it up sushi-style:
Let it cool for 5 minutes until pliable but not sticky. If using fruit roll-ups, lay one over the top like nori. Then, starting from one short end, roll it tightly into a log (like a burrito). Press the end to seal.
Slice and decorate:
Use a sharp knife (wipe with oil to prevent sticking) to cut the log into 1-inch thick “sushi” pieces. Top each with a Swedish Fish “garnish” or sprinkle extra Fruity Pebbles for texture. Dust with powdered sugar if you want a fancy finish.
6. Tips for Perfect Sushi Rolls
- Work quickly: The mixture sets fast.
- Grease your hands: Prevents sticking.
- Don’t overheat marshmallows: Keeps texture soft.
- Use a sharp knife: Clean cuts make it look like real sushi.
Think of it like rolling a burrito—tight and even is the goal.
7. Creative Variations
Want to mix things up?
- Chocolate drizzle: Add a sweet finish.
- Peanut butter mix-in: For a nutty twist.
- Different cereals: Try Cocoa Pebbles or Rice Krispies.
You can customize it just like real sushi rolls.
8. Decorating Ideas
Make your Fruity Pebbles Sushi stand out:
- Add Swedish Fish on top
- Wrap with fruit roll-ups
- Sprinkle powdered sugar
- Roll edges in extra cereal
Presentation makes this dessert even more fun.
9. Serving Suggestions
Serve these on a platter like real sushi for maximum effect. You can even use chopsticks for fun!
They’re perfect for:
- Birthday parties
- Sleepovers
- Family movie nights
10. Storage & Shelf Life
Store your sushi in an airtight container at room temperature for up to 2 days.
Avoid refrigeration—it can make them hard.
11. Common Mistakes to Avoid
- Overcooking marshmallows: Leads to hard texture
- Not pressing evenly: Causes uneven rolls
- Waiting too long to roll: Makes shaping difficult
Timing is everything here.
12. Nutritional Overview
Let’s be honest—this is a treat, not a health food. But it’s perfect for occasional indulgence.
Expect:
- Sugary sweetness
- Light crunch
- Small portion satisfaction
13. Why Kids Love Fruity Pebbles Sushi
Kids love anything colorful and hands-on. This recipe checks both boxes.
It’s like edible playtime—mixing, rolling, slicing—it keeps them engaged from start to finish.
14. Perfect Occasions for This Dessert
This dessert shines when you want something fun and different:
- Holiday parties
- School events
- Weekend treats
It’s always a conversation starter.
15. Final Thoughts
Fruity Pebbles Sushi is more than just a dessert—it’s an experience. It takes something ordinary and turns it into something playful and memorable.
If you’re looking for a recipe that’s easy, colorful, and guaranteed to impress, this is it. So why not give it a try? You might just find yourself making it again and again.
FAQs
1. Can I make Fruity Pebbles Sushi ahead of time?
Yes, you can make it a day in advance and store it in an airtight container.
2. Can I use large marshmallows instead of mini ones?
Absolutely! Just melt them down the same way—mini marshmallows are just easier to handle.
3. What can I use instead of fruit roll-ups?
You can skip them or use thin fruit leather or even leave the rolls plain.
4. How do I keep the mixture from sticking?
Lightly grease your hands or use a bit of water to prevent sticking.
5. Can I freeze Fruity Pebbles Sushi?
It’s not recommended, as freezing can change the texture and make it less enjoyable.
Fruity Pebbles Sushi
Ingredients
- 4 cups Fruity Pebbles cereal
- 3 tbsp unsalted butter
- 4 cups mini marshmallows
- Swedish Fish candies (optional)
- Fruit roll-ups (optional)
- Powdered sugar (optional)
- Extra Fruity Pebbles (optional)
Instructions
- Melt the base: In a large pot over low heat, melt the butter. Add the mini marshmallows and stir constantly until fully melted and smooth (about 3-5 minutes). Don't let it burn—keep it gentle!
- Mix in the crunch: Remove from heat and quickly fold in the Fruity Pebbles cereal. Stir until everything's evenly coated in that gooey goodness. The colors will pop!
- Shape the 'rice': While still warm, scoop the mixture onto a sheet of parchment paper or a lightly greased surface. Press it into a thin rectangle (about 9x12 inches) using your hands or a spatula. If it sticks, wet your hands a bit.
- Roll it up sushi-style: Let it cool for 5 minutes until pliable but not sticky. If using fruit roll-ups, lay one over the top like nori. Then, starting from one short end, roll it tightly into a log (like a burrito). Press the end to seal.
- Slice and decorate: Use a sharp knife (wipe with oil to prevent sticking) to cut the log into 1-inch thick 'sushi' pieces. Top each with a Swedish Fish 'garnish' or sprinkle extra Fruity Pebbles for texture. Dust with powdered sugar if you want a fancy finish.