Rice Krispie Peanut Butter Balls
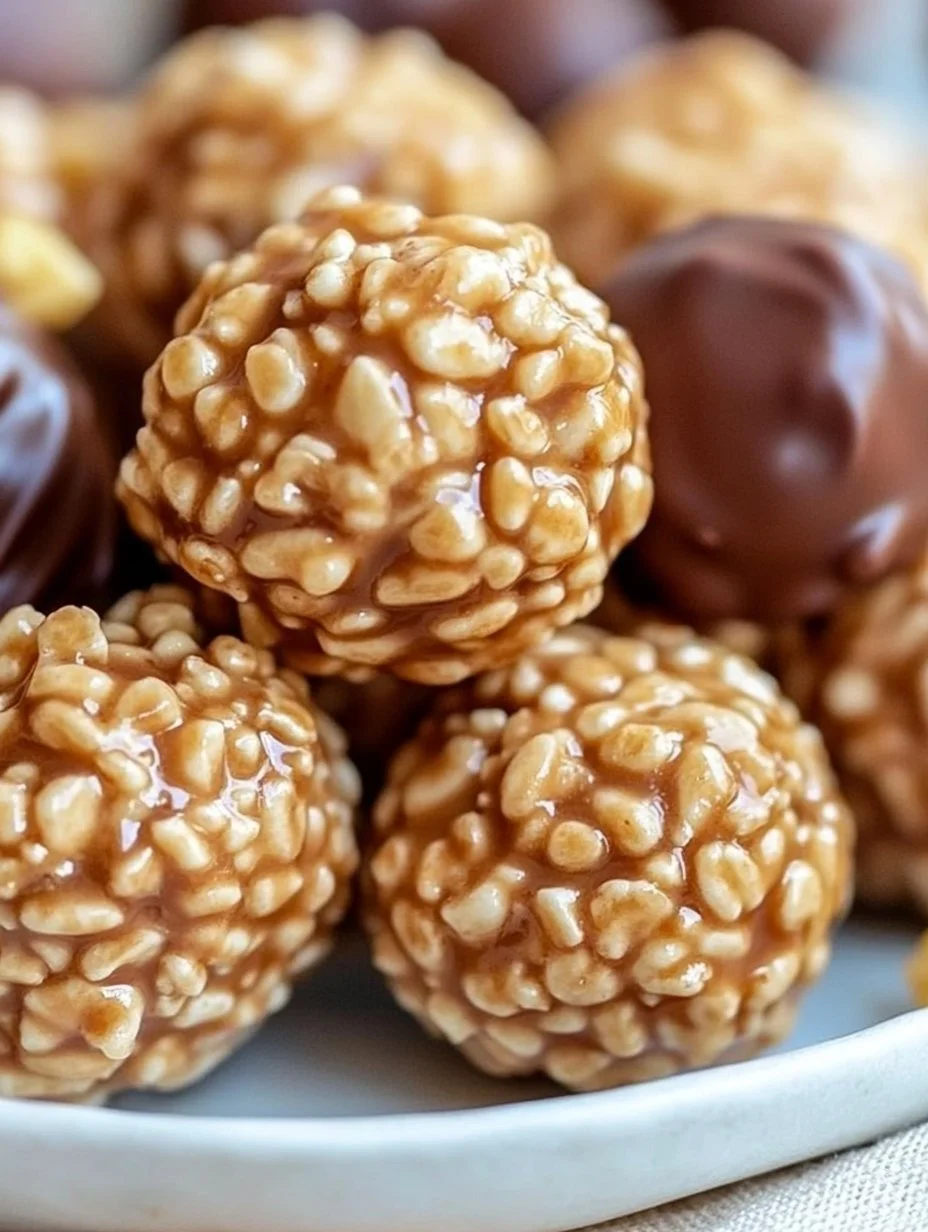
If you’re in search of a delightful treat that combines the nostalgia of childhood snacks with the richness of adult flavors, you’ve landed in the right place! These Rice Krispie Peanut Butter Balls are an irresistible blend of crunchiness and creaminess, making them a perfect pick-me-up or dessert for any occasion. Not only do they satisfy a sweet tooth, but they also bring the added benefit of being incredibly simple to whip up. Let’s dive into why this recipe is beloved and how you can make your own delicious batch!
Discover Why This Recipe Shines
This recipe stands out for several reasons. First off, it’s delightfully easy and quick to prepare, requiring only a handful of ingredients that you might already have in your pantry. Secondly, it’s a budget-friendly option, allowing you to treat yourself and your loved ones without breaking the bank. Lastly, these quaint little snacks are versatile; they work wonderfully for parties, school lunches, or simply as an afternoon treat. Their crunchy exterior and creamy peanut butter interior create a texture contrast that everyone loves!
Get to Know the Easy Cooking Steps
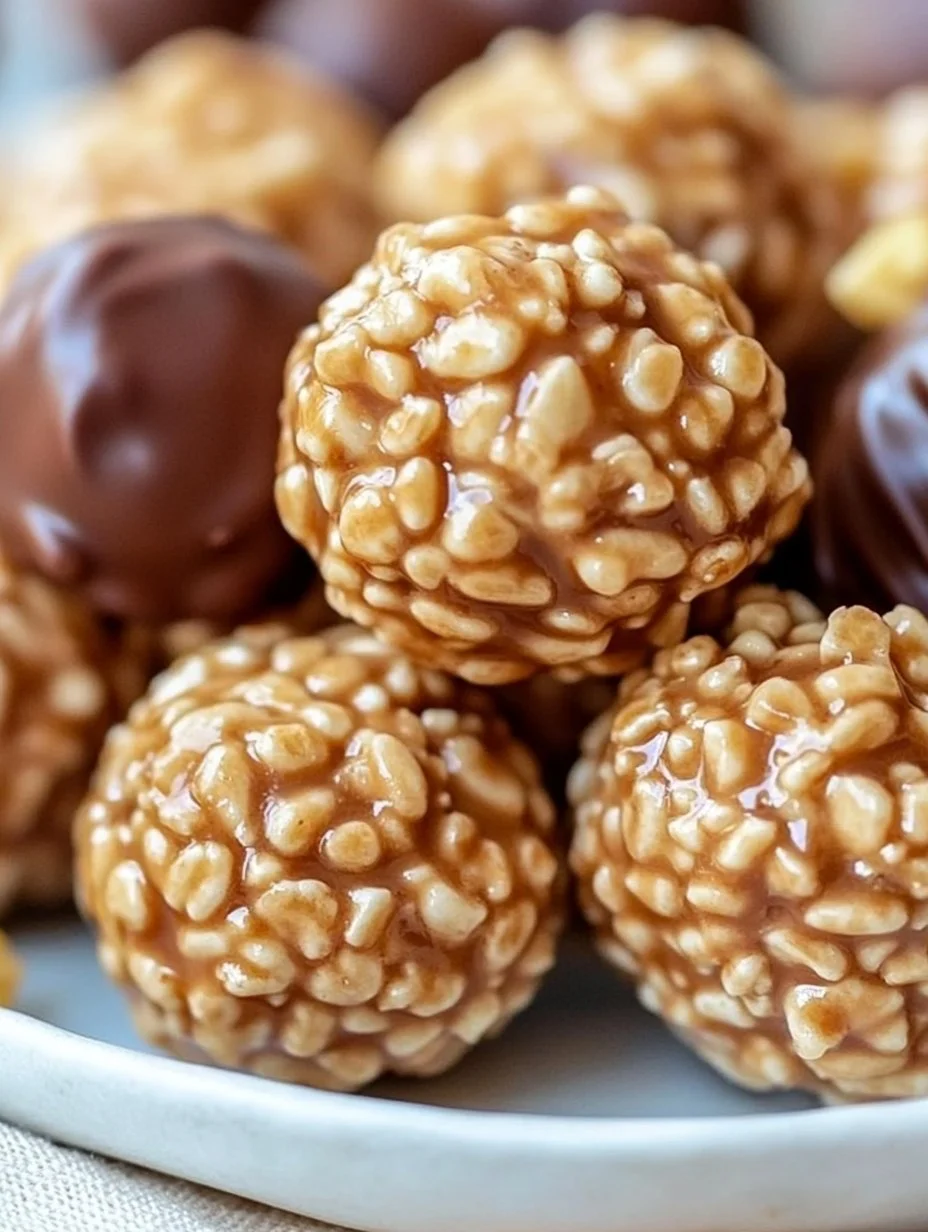
Creating these delightful Rice Krispie Peanut Butter Balls is a straightforward process that even beginner cooks can master. You start by mixing together some beloved pantry staples until they form a sticky and cohesive mixture. After rolling them into balls, a quick chill in the refrigerator helps them firm up nicely. The last touch is a delectable dip in melted chocolate, which adds a touch of indulgence! It’s as simple as that—the end result is both beautiful and delicious.
Ingredients
- Prep Time: 15 minutes
- Cook Time: 10 minutes (melting chocolate)
- Total Time: 55 minutes
- Servings: 24 balls
For this recipe, you will need:
- 2 cups Rice Krispies cereal
- 1 cup creamy peanut butter
- 1/2 cup powdered sugar
- 2 tablespoons unsalted butter, melted
- 1 cup semi-sweet chocolate chips, melted for dipping
- Optional: Sprinkles or crushed peanuts for decoration
The Rice Krispies cereal gives these treats their signature crunch. Creamy peanut butter adds richness and flavor, while powdered sugar provides just the right amount of sweetness. A hint of melted butter helps everything stick together beautifully!
Here’s How to Make Them
- In a large mixing bowl, combine the Rice Krispies, peanut butter, powdered sugar, and melted butter. Stir until the mixture is well combined and sticks together.
- Scoop out tablespoon-sized portions and roll them into balls. Place on a parchment paper-lined baking sheet.
- Chill the balls in the refrigerator for 30 minutes to firm up.
- Once chilled, dip each ball into melted chocolate, using a fork to help coat them evenly. Allow the excess chocolate to drip off before returning them to the baking sheet.
- If desired, immediately sprinkle with decorative sprinkles or crushed peanuts while the chocolate is still wet.
- Refrigerate the balls for another 30 minutes or until the chocolate has set.
Make sure to give your mixture a thorough stir so that all the ingredients incorporate well together. If your peanut butter is too thick, simply warm it slightly before mixing, which will make it easier to combine.
Serving Suggestions You’ll Love
These Rice Krispie Peanut Butter Balls make for a perfect after-school snack or a delightful dessert at any gathering. For a party, consider serving them alongside a few other treats to create a sweet buffet. Pair them with fresh fruit like strawberries or bananas for a fun contrast in flavors. If you’re feeling fancy, consider a chilled glass of milk or an iced coffee for a great complement!
How to Store and Reheat Them
These treats are easy to store, allowing you to enjoy them later. Simply place them in an airtight container and refrigerate; they will last for up to a week. If you want to keep them longer, you can freeze them. Just make sure to lay them flat in a single layer and then transfer them to a freezer-safe container once fully frozen. To reheat, you don’t need to, but if you’d like a warm treat, you can microwave them for just a few seconds—be careful not to melt the chocolate!
Expert Cooking Advice
One of the most common mistakes when making these treats is not allowing enough time for chilling. The chilling step is crucial for achieving the right texture, so don’t skip it! Also, if you find your mixture is too crumbly, add a touch more peanut butter or melted butter to help everything hold together. Lastly, if the chocolate seems too thick for dipping, gently reheat it for a smoother consistency.
Delicious Variations to Try
While this recipe is fabulous as is, there are plenty of ways to jazz it up! For instance, you can swap out the creamy peanut butter for crunchy peanut butter for added texture. You could also mix in mini chocolate chips or dried fruits like cranberries or raisins for a fruity twist. If you’re feeling adventurous, try rolling them in toasted coconut instead of crushed peanuts!
Common Questions About This Recipe
Can I use natural peanut butter?
Yes, but keep in mind that natural peanut butter may be more oily, requiring adjustments to other ingredients to maintain the consistency.
How can I make them dairy-free?
Substitute the butter with coconut oil and use dairy-free chocolate chips for a completely dairy-free version.
Are these suitable for kids?
Absolutely! These delightful treats are perfect for kids, but be sure to supervise younger children when eating to avoid any choking hazards with the chocolate coating.
Can I add protein powder to the mixture?
Yes! You can add a scoop of your favorite protein powder for an extra health boost; just be mindful that it may affect the texture.
What can I do if the mixture is too sticky?
If your mixture seems too sticky to handle, you can chill it in the refrigerator for a short time, which will make it easier to roll into balls.